How to setup hardhat environment?
A guide to setting up your Hardhat development envirnmet.


Step 1
Hardhat is a development environment for Ethereum smart contracts. To set it up, follow these steps:
Install Node.js and npm: Ensure you have Node.js and npm installed on your machine. You can download them from nodejs.org.
Initialize a new Node.js project: Open a terminal and run these commands.
 mkdir Hello-World  //for make diretory
 cd Hello-World    // initialize folder
 npm init --yes   // npm in
You will get package.json file after these three commands.
Install Hardhat: Run this to install Hardhat as a development dependency.
npm install --save-dev hardhatIf you have followed the instructions properly, and everything went according to the plan, you have HardHat installed. 🎉
Also package-lock.json file created.
Initialize Hardhat: Run
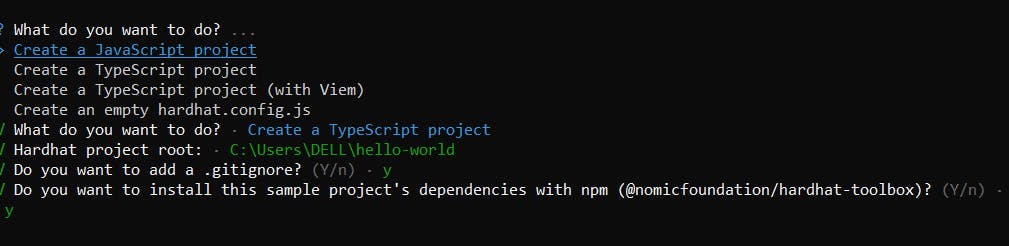
npx hardhatto initialize the Hardhat project. Follow the prompts to create a hardhat.config.js file.npx hardhatYou will see something like this:
Create a JavaScript project: Just follow through the questions and answer them yes. For me it was something like below:
Hardhat ether: You need to install some more dependencies. Hardhat ethers is a plugin that gives us access to
ethers.jslibrary.ethers.jslibrary gives us a way to interact with the blockchain world, we can deploy contracts, we can fetch contracts, we can call their functions, all thanks to this library.npm install --save-dev @nomiclabs/hardhat-ethers ethers --forceLastly, run the following command on safe side to ensure that all required installations are done:
npm install @nomiclabs/hardhat-ethers ethers hardhat @nomicfoundation/hardhat-toolbox --forceInstall additional plugins (optional): Depending on your needs, you might want to install additional plugins. For example, you can install this plugin for Ethereum testing:
npm install --save-dev @nomiclabs/hardhat-waffleRemember to update your hardhat.config.js file to include these plugins.
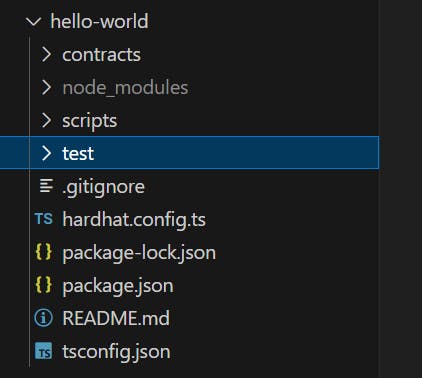
Project Structre:
Side tip : Install Solidity Extension by Juan Blanco in VScode to help with syntax and coding error issues.
Write your smart contracts: Create your Ethereum smart contracts in the contracts/ directory.
Run tests (optional): If you installed the testing plugin, write tests in the test/ directory and run them using
npx hardhat test.Compile your contracts: Run
npx hardhat compileto compile your smart contracts. The compiled artifacts will be stored in the artifacts/ directory.Configure network settings: Edit your hardhat.config.js file to configure Ethereum network settings, such as the network to deploy to.
Deploy contracts (optional): If you want to deploy your contracts, you can do so using npx hardhat run
scripts/deploy.js.Interact with your contracts: Use the Hardhat console or write scripts to interact with your deployed contracts.
That's a basic setup for Hardhat. Customize it based on your project requirements and explore the documentation for more advanced features.